


Help Center
Adobe InDesign Help
Step 1: Creating a New Document
After launching your InDesign application,
- Choose File > New > Document... (See Figure 1)
- Keyboard Shortcut: Ctrl+N for PC users, Cmd+N for Mac users
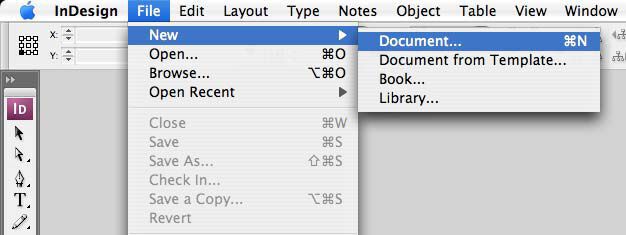
Figure 1
When the New Document window appears, (See Figure 2)
- Set the Width & Height of your artwork to the final size of the product you are creating. You can refer to this table for a quick list of product dimensions.
- Set the Bleed to 1/8" (0.125) on all four side of the artwork. This will allow an extra 1/8" (0.125") on each side of the card, which will be trimmed after the printing is complete. Please see more information about bleeds below.
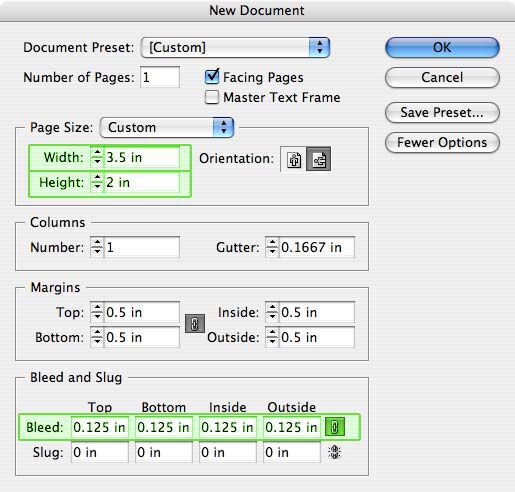
Figure 2
Step 2: Saving Your Files
Once you have finished designing your layout, you are ready to save and submit your file to PrintRunner. There are numerous formats that
can be saved or exported from Adobe InDesign. We will instruct you of the main formats, however, we recommend PDF format over
any other, simply because it is the PREFERRED and MOST RELIABLE format of printers world-wide.
Use the links below to quickly navigate to the format you wish to use:
Export to PDF
The reason why we prefer PDF files is because these are the most reliable format for transporting from computer to computer, and is the preferred format among printers worldwide. If you submit perfect PDFs to
PrintRunner, your order will typically move through our production process without any hang ups. It reduces errors relating to linking of fonts and graphics, as well as often reducing the overall file size
that you would upload to your printer.
- Go to the File menu and choose Export... (See Figure 3)
- In the Export window, go to the Format dropdown bar and choose Adobe PDF. (See Figure 4)
- In the Save As field, give your file an appropriate name.
- Click the Save button.
Figure 3

Figure 4
- In the Export Adobe PDF window, choose Press Quality as the Adobe PDF Preset. (See Figure 5)
- In the General setting, set the Compatibility to Acrobat 8 or the highest version you have.
- You’ll want to print All the pages unless you have unneeded blanks and leave Spreads unchecked unless you are submitting a 4 page half-fold brochure.
- Check only the boxes highlighted below under the Options section.
Figure 5
- In the Compression setting, choose Bicubic Downsampling and set the Pixels/Inch to 300 for images above 450 for both Color and Grayscale Images. Choose Bicubic Downsampling and set the Pixels/Inch to 600 for images above 900 for Monochrome Images. (See Figure 6)
- Set the Compression to ZIP for both Color and Grayscale Images and CCITT Group 4 for Monochrome Images.
- Check the boxes for both Compress Text and Line Art and Crop Image Data to Frames.
Figure 6
- In the Marks and Bleeds setting, check the box for only the Crop Marks. (See Figure 7)
- Set the Weight of the Marks to .25 pt and the Offset to .125”.
- Under the Bleed and Slug section, set the Bleed to .125” for all four sides.
Figure 7
- In the Output setting, choose No Conversion for the Color Conversion dropdown. (See Figure 8)
- Don’t Include Profile for the Profile Inclusion Policy.
- Click the Ink Manager button to open its window. Check the All Spots to Process box to convert any possible Spot colors used in the document to 4 color process and then click OK. Note: If you have placed a custom order using Spot colors, than you will want to leave those specified colors remaining.
Figure 8
- Finally, in the Advanced setting, Subset the Fonts to 100%. (See Figure 9)
- Click on the Save Preset button at the bottom left. In the Save Preset window, give your Preset a new name such as My Print Setting or PrintRunner and click the OK button. You will now have a new preset in your available Adobe PDF Preset dropdown in InDesign. Click Export to save the current file as a PDF.
Figure 9
Save and Package your InDesign File
If you choose to submit your file in InDesign, you will need to Package the file with its supporting Fonts and Links. You cannot just
submit the InDesign file by itself unless you outline all the Fonts and Embed all the Links.
- Go to the File menu and choose Save As... (See Figure 10)
- In the Save As window, go to the Format bar and choose InDesign CS4 document. (See Figure 11)
- In the Save As field, give your file an appropriate name and location and then click the Save button.
- To package the file, go to the File menu and choose Package... (See Figure 12)
Figure 10
Figure 11

Figure 12
- Go to the Fonts setting to view the information about the Fonts that will be properly embedded. You can check the Show Problems Only box to filter only for problems. If there are any problems, you can click the Find Font... button to do a local search on your computer for the font. (See Figure 13)
- Then go to the Links and Images setting to view the information about the Links that will be properly embedded. You can check the Show Problems Only box to filter only for problems. If there are any problems, you can click the Repair All button to fix the Link to that particular image. (See Figure 14)
Figure 13
Figure 14
- Click the Package button after checking the Fonts and Links.
- In the Printing Instructions window, you have the option of filling out the fields with any information that you may feel necessary. This will create a separate text file that will generate with the Package. When you are finished, click Continue. (See Figure 15)
- In the Create Package Folder window, give your Folder Package an appropriate name and location. (See Figure 16)
- Check the boxes to Copy Fonts, Copy Linked Graphics and Update Graphic Links in Package.
- Click the Save button.
Figure 15
Figure 16
When done packaging the file, you will be able to view the contents of the Folder Package.
- To submit this file to PrintRunner, you will need to use a Compression software such as WinZip Or Stuffit to condense the folder and its contents into one .ZIP or .SIT file.
Figure 17