


How to Design Sticker Sheets (With Expert Tips From a Designer)
Sticker printing is a popular way for brands and businesses to promote and raise awareness at budget-friendly costs. You can add them as packaging inserts to customer purchases, use as freebies for marketing events, or add them to subscription boxes.
One of the most widely used sticker formats is sticker sheets. Cult favorite beauty company Glossier gained popularity on social media for their customers’ unboxing videos, which always included a free sticker sheet of their logo and on-brand iconography for every purchase.
Custom sticker sheets don’t just work for brands and businesses. You can also use them for your party swag bags, journaling, and scrapbooking.
This guide covers everything beginners need to know about designing a sticker sheet with various designs on your preferred editing application.
Our resident art director, KD Macalinao, who has been in the printing industry for over ten years, shares some of her best sticker printing design tips to guide you as you get started.

For those with little to no design experience, what’s the most important consideration before getting started on sticker printing?
Whether you are an expert designer or not, the first thing you should think about is the purpose of your stickers. Once the purpose and function are clear, it will be easier to answer follow-up questions about the appropriate sticker size, the elements included in the design, and the kind of sticker material to print on. Answering the simple question, “Why do I need these stickers?” helps you base every design decision on that answer and save yourself time from multiple revisions.
What are the most common mistakes you’ve seen people make when designing stickers?
Skipping prototyping – it would be a mistake not to test print your design. What appears on your screen often looks different from what comes out in the actual print in terms of scale. You can prototype your design by printing it on your own desktop printer. Seeing it in person allows you to check errors, sizes, spacing, legibility of text elements and inspect your design’s overall look.
Over-stuffing – too much information and embellishment can lead to inefficient, difficult-to-understand designs.
If you can give only one design tip to beginners, what should they remember when designing stickers?
Less is more. Attention is a limited resource, and simpler designs are easier to understand. Are you using five different colors? Why not try using two colors that are complementary to one another? Have 50 characters of text? Why not make a more concise statement? Are you using five different fonts? Just stick to one or two, please. Always aim for clarity — minimizing the design elements is one sure way to send a clear message.
What easy-to-use tools or design applications would you recommend for beginners?
For non-designers, Canva is a good start. I’ve heard some peers raving about how simple it is. Figma is more for professionals, and it has a more intuitive interface compared to Adobe products. But if you’re seriously looking into becoming a professional designer, Adobe Photoshop and Illustrator are two logical choices.
How to Design and Format Sticker Sheets on Photoshop
Here is a quick guide on creating a sticker sheet with various designs and custom shapes using Adobe Illustrator.
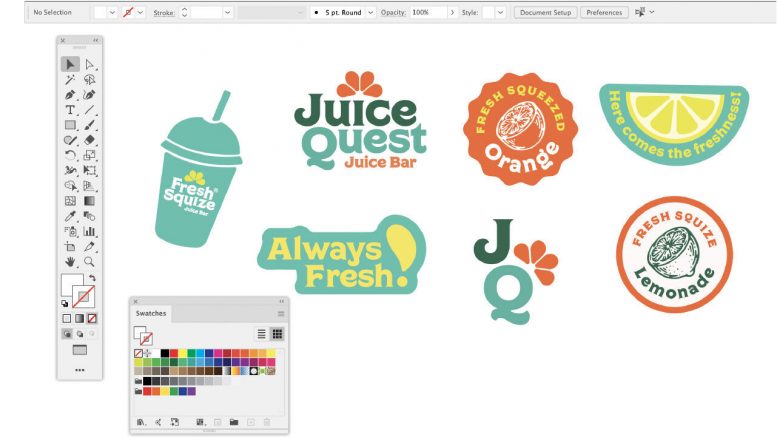
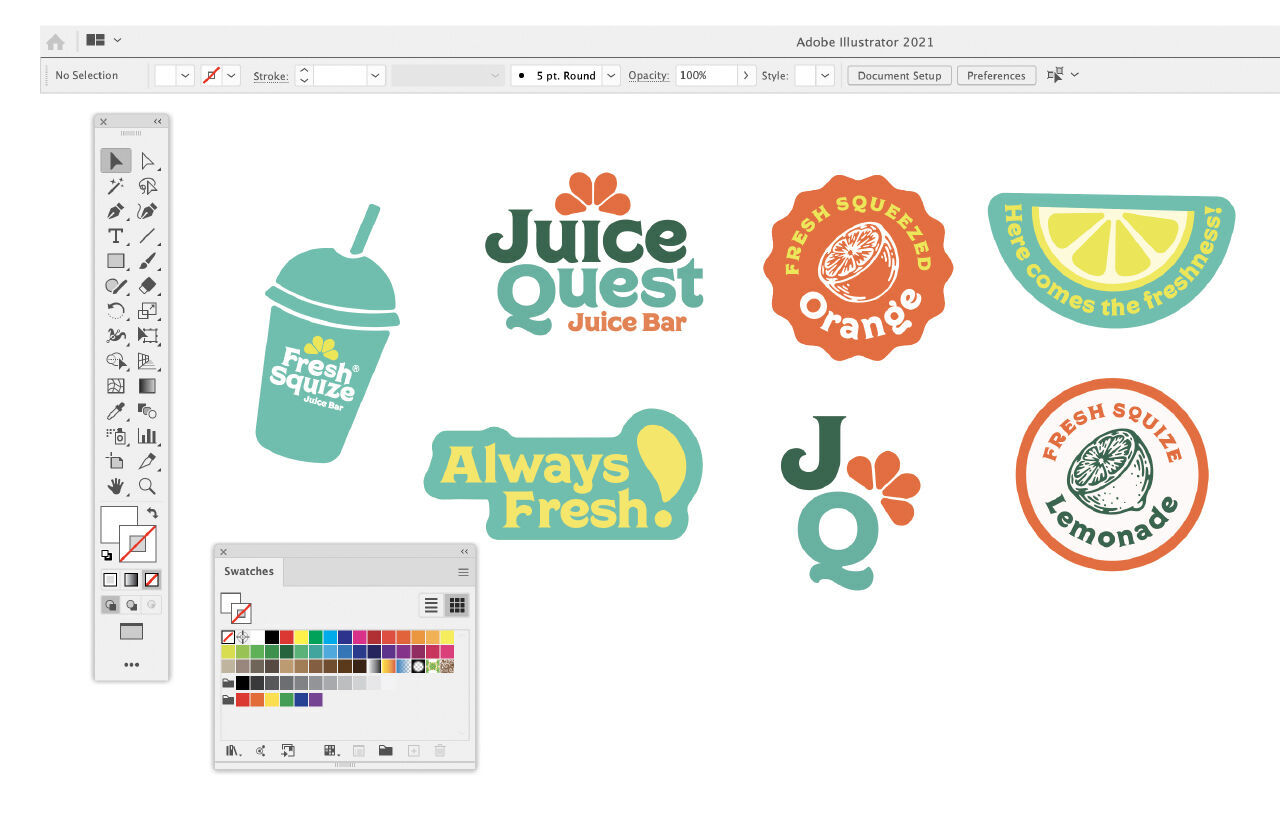
1. Create your sticker. You can create shapes, type art, and illustrations in Adobe Photoshop or Adobe Illustrator. These sticker designs must be transparent PNG files with no background.
2. Create your sticker sheet layer. Create a blank sticker sheet that has a white background. You can name this layer “artwork”, as this is where you will lay out all the sticker designs.
3. Arrange your sticker designs. Adjust the sizes and placement of each sticker, keeping in mind to leave enough space between each design.
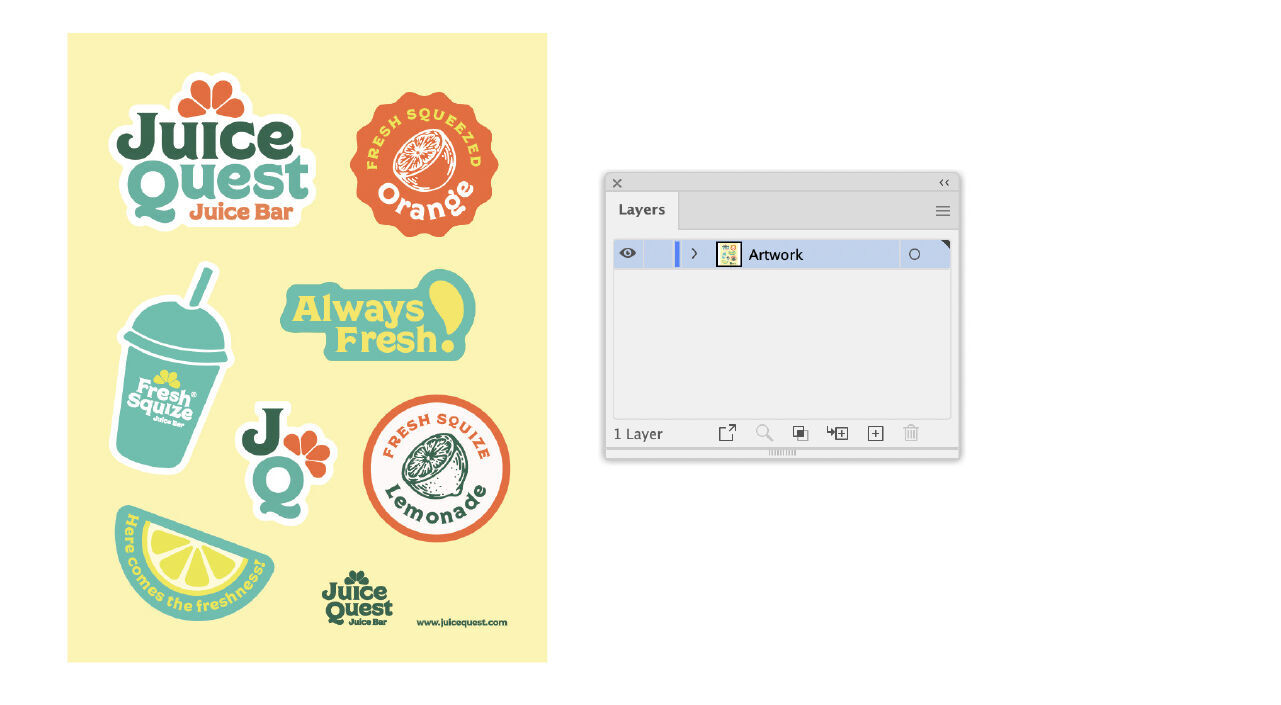
Tip: Know the sticker sheet size you will print on so you can already set the file size and check if each sticker’s dimensions are correct. For PrintRunner, we offer various sizes for sticker sheets. We recommend size 4” x 6”, which is perfect for freebies and packaging inserts.
4. Create your cutlines. PrintRunner can do your cutlines for you, but if you want to adjust the cutlines yourself, start by creating a new layer and naming it “cutlines”.
Click on the “artwork” layer, select all your sticker designs and copy, go back to the new “cutlines” layer and paste so the sticker artworks are on top of one another.
Transform your designs in the “cutlines” layer to solid shapes by clicking Window > Pathfinder > Unite. Then select the solid shape, set the Fill color to none and the stroke color to 100% magenta. You should repeat this step for each sticker design.
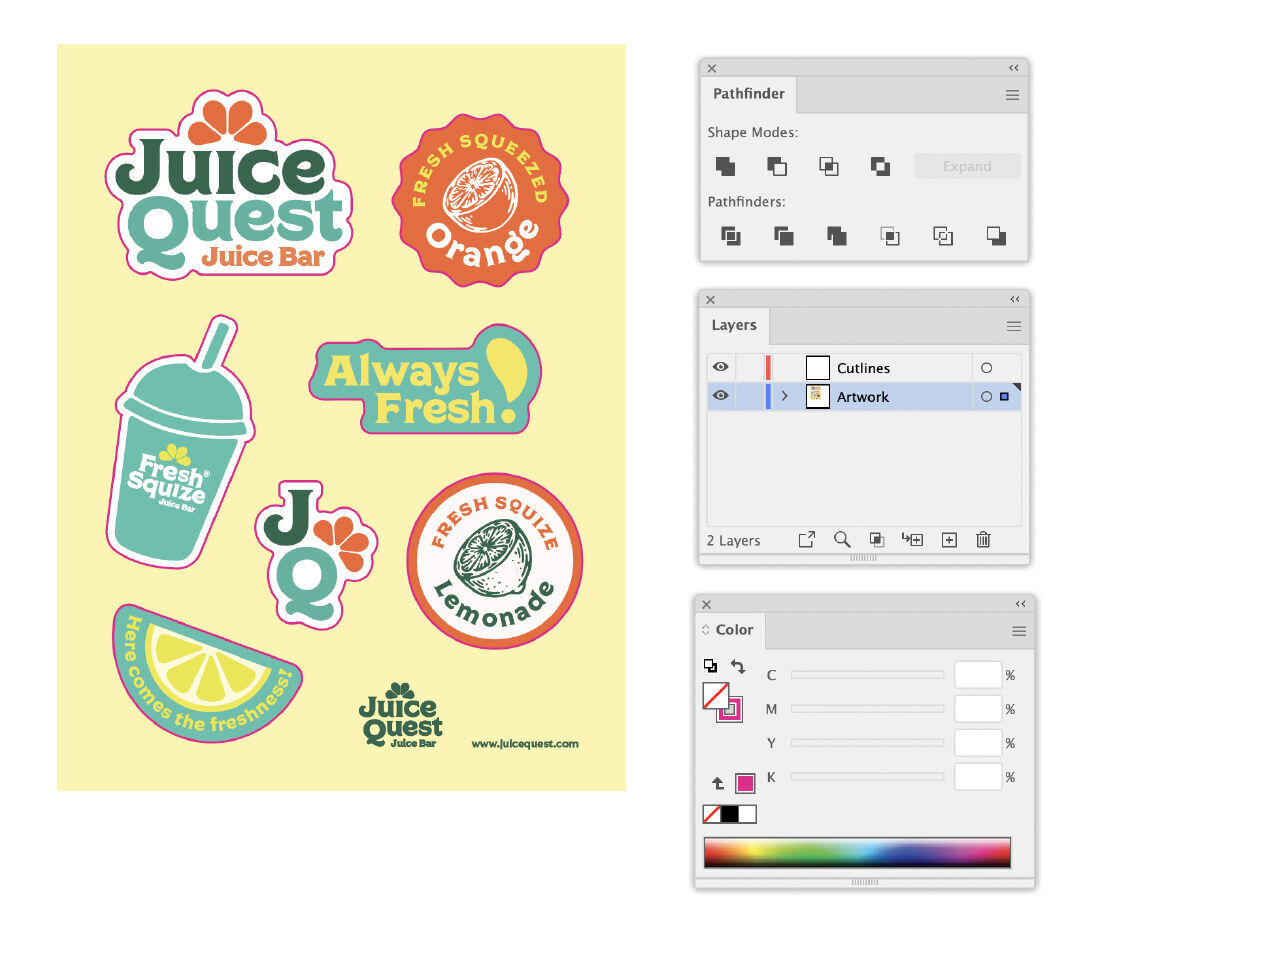
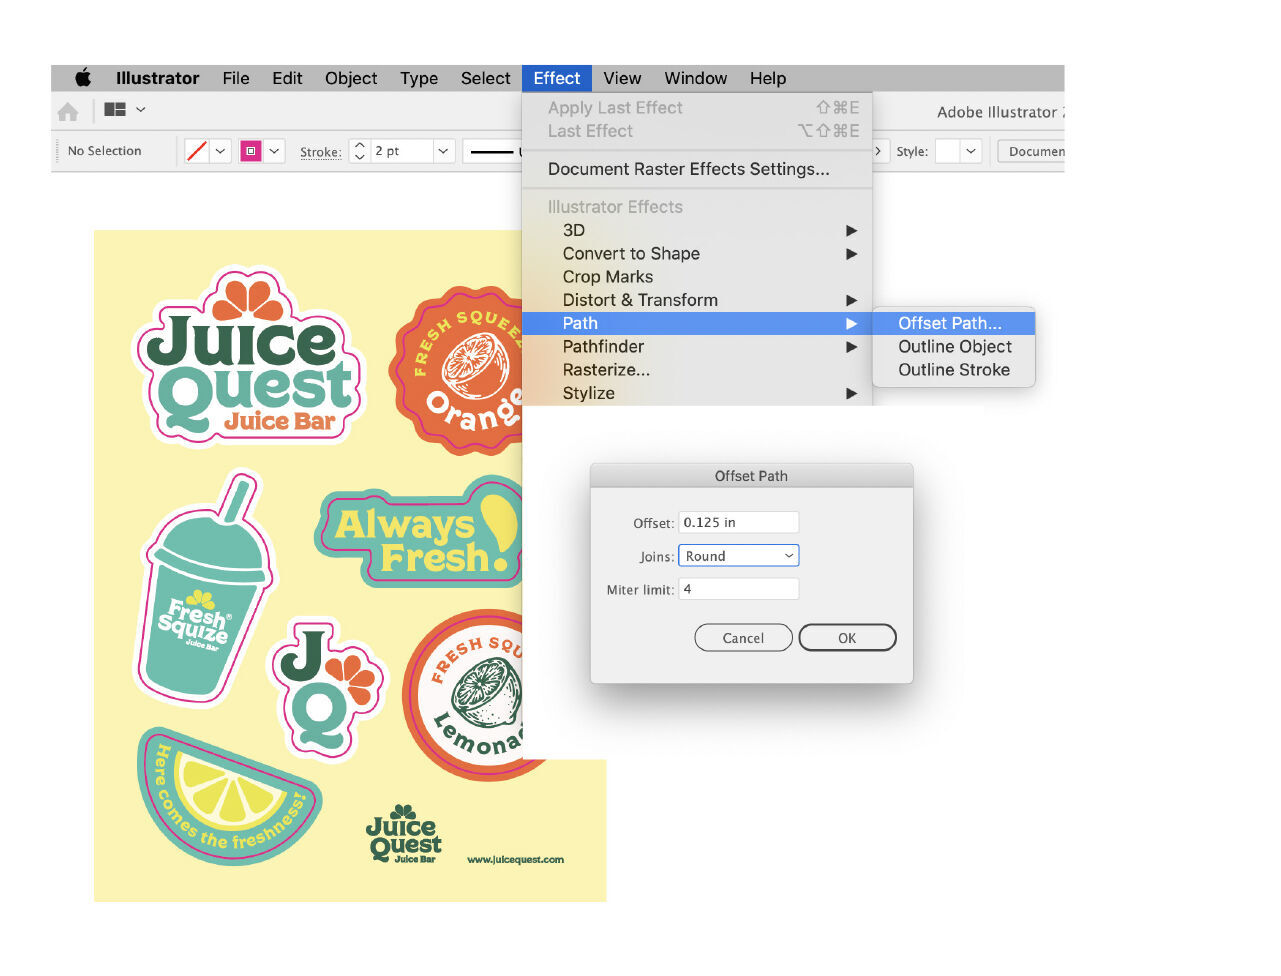
5. Set the bleed. This next step will create the space between your sticker design and the trim line for laser cutting. Select the “cutlines” layer. Now go to Object > Path > Offset Path and set the distance you want. We recommend leaving .125” of space between the sticker and the kiss-cut line. We recommend selecting “Round” to create a shape with rounded edges. Use a thin 1 pt. stroke to indicate the kiss-cut line. This colored stroke will not appear in the final printed product. It is merely a guide for laser cutting.
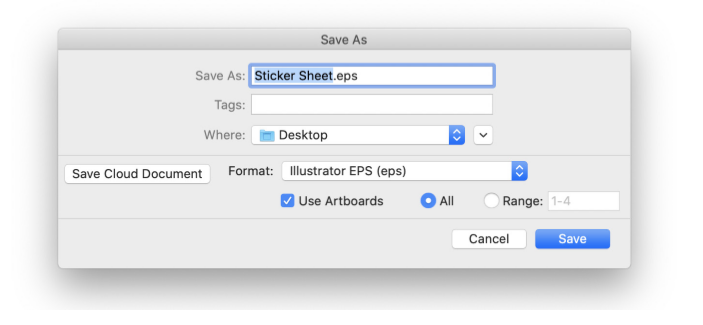
6. Save your file. For accurate and high-quality printing results, check that the resolution is no less than 300 dpi and is in CMYK color mode. We recommend saving your file in PDF, PNG, or EPS format.
Ready to print custom sticker sheets? PrintRunner’s dedicated prepress team offers free design proofs with every sticker order. If you’re unsure about how your sticker sheets will turn out, we will carefully inspect your design file to make sure it prints according to your exact specifications.
Not sure if sticker sheets are suitable for you? We have other options like cut-to-size (die-cut) stickers and kiss-cut stickers widely used for brand promotions. You can also shop popular stickers by use so you can choose the right type to suit your application needs.
Related Articles: